Roll up garage doors can save space and provide dependable access, but installing one takes careful measuring and steady handling. The door curtain, guides, brackets, and spring assembly must match the opening and the manufacturer’s instructions. Even a small alignment error can cause rubbing, uneven movement, or extra strain. Details matter.
This guide outlines the main stages, from checking the opening and gathering tools to securing the guides and testing the door. Measure the width and height at several points; older garage openings may not be perfectly square. Confirm the required clearances before unpacking heavy parts, and keep the work area clear of vehicles and loose tools. Do not guess. Door designs vary, so instructions for one model may not apply to another. Spring-loaded components can store substantial energy and may cause serious injury if handled incorrectly. If the manual calls for specialist equipment, or you are unsure how to secure or adjust a component, pause and contact a qualified installer. A door that looks straight is not necessarily operating safely. Check that it moves smoothly, stays aligned, and responds correctly to its specified controls before regular use. The process can feel less straightforward than the diagrams suggest. Taking time to verify each step is better than forcing a part into place.
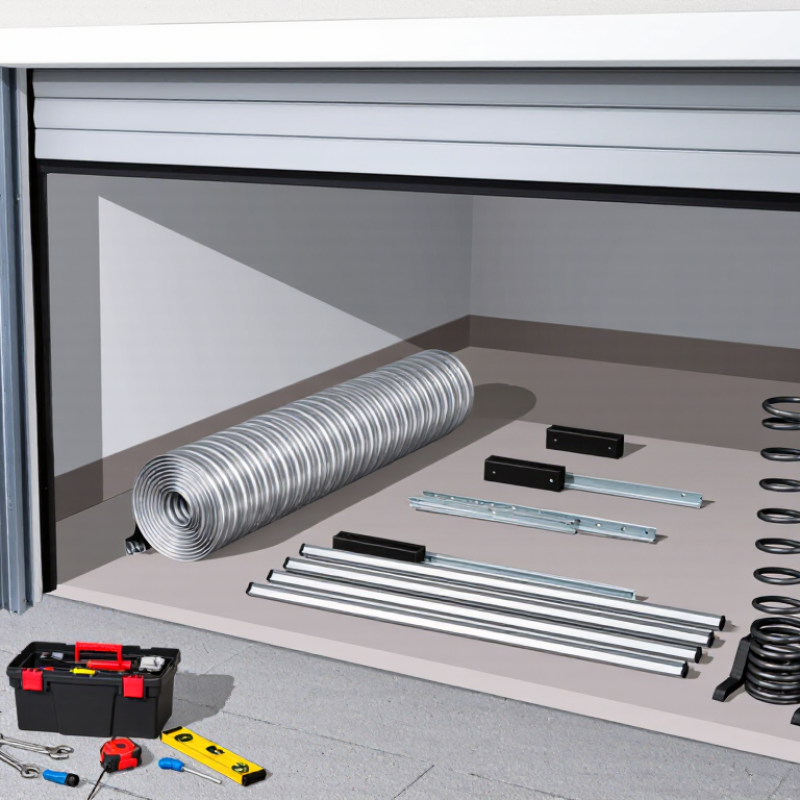
Measure the opening at the top, middle, and bottom, both vertically and horizontally. Record the smallest width and height; garage openings are not always square. Use a sturdy tape measure, and check that it sits straight rather than following an uneven edge. Small detail. Big consequence. A few millimeters can affect how the curtain tracks or seals.
Next, compare your notes with the door manufacturer’s specifications. Check the required headroom above the opening and side room beside each jamb. Include space for brackets, guides, and the roll itself, not just the door curtain. Look for obstructions such as lights, pipes, shelves, and a low ceiling. Check the floor across the full opening, too. A sloped or cracked threshold may leave a gap under the door. I would recheck any measurement that seems unusually tight; it is easy to measure from trim instead of the structural opening. Write down each clearance and confirm the installation drawings before ordering or fitting parts. If the site differs from the stated requirements, pause and seek qualified guidance rather than forcing the assembly into place.
Before installation, confirm which door standard applies. ANSI/DASMA 102 covers sectional garage doors; a coiling roll-up curtain is not automatically covered by it. Check the door’s nameplate, product documentation, and approved drawings. Match the stated model, size, track, springs, brackets, and hardware to the components on site. A mismatch can affect both operation and the door’s rated performance. This is easy to miss.
DASMA Technical Data Sheet 156 explains that wind-load requirements depend on factors such as design wind speed, exposure, building height, and opening size. Check the door’s design-pressure rating in pounds per square foot against the project documents and local design requirements; a generic wind-speed claim is not enough. Look for the rating label before the guides or drum hide it. Confirm fastener type and spacing, too. ANSI/DASMA 102 provides performance criteria for sectional doors, but it does not replace checking whether that standard fits the product being installed. If the documentation is unclear, pause and verify the applicable standard and rating with the supplier or a qualified installer. I would double-check it.
Use the door’s product label and documentation to confirm its rated design pressure and that the supplied components match the installation requirements. ANSI/DASMA 102 covers sectional doors; confirm the applicable standard for your door type and local code.
These bars convert example pressure values from pounds per square foot (psf) to pascals (Pa), using 1 psf = 47.8803 Pa. They are unit conversions, not minimum ratings or requirements specified by ANSI/DASMA 102.
How to Install Roll Up Garage Doors?
Anchor brackets and guides must transfer door loads into structural framing, not thin siding or trim. Locate the framing and confirm its condition before drilling. Set each guide plumb, then fasten brackets through the specified holes with the fastener type, diameter, and embedment required by the door schedule. Do not substitute deck screws or guess at fastener spacing. Wind pressure and door weight vary by opening, so follow the project’s approved details. FEMA’s 2020 Building Codes Save study estimated that modern building codes adopted since 2000 could help avoid about $1.6 billion in annual losses nationwide. That figure is not a door-anchor rating, but it shows why code-based load paths matter.
Tips: Check for buried wiring before drilling. Use a level on both guides. Tighten fasteners evenly, and inspect for gaps or crushed framing. A bracket that looks secure can still miss the framing.
Before hanging the curtain, verify that each anchor is seated and that the guides remain parallel. Recheck the fasteners after the door is operated; movement or fresh wood dust can signal a problem. I have seen small alignment errors become noticeable only after the curtain starts rubbing. That is easy to miss. Use the manufacturer’s installation instructions and local structural requirements when details conflict or framing is damaged.
| Installation area | Structural attachment | Fastener specification | Placement and installation checks |
|---|---|---|---|
| Opening preparation | Confirm that jambs and the header are sound structural framing, not trim, siding, or finish material. | No installation fastener is specified at this stage. Identify the framing material and check the door manufacturer’s approved anchor schedule. | Check opening width, height, plumb, level, and clearance against the door’s installation instructions. Resolve framing damage or inadequate backing before installation. |
| Guide tracks | Fasten each guide through its designated holes into the structural jamb or installed structural backing. | Use the manufacturer-specified, corrosion-resistant screws or bolts for the actual substrate. For wood framing, use approved structural wood screws or lag screws; for steel or masonry, use anchors specifically rated and approved for that substrate. | Use the specified fastener at each required factory hole. Keep guides parallel, aligned, and at the stated spacing; do not substitute drywall screws or fasten only to cladding. |
| End plates and anchor brackets | Attach each end plate or bracket to the designated structural support at the sides of the opening, as shown in the door-specific drawings. | Use the exact bolt, screw, washer, anchor type, diameter, length, and quantity required by the manufacturer’s schedule or approved project details. | Support the assembly during installation. Confirm both brackets are level and correctly positioned before tightening. Do not use a generic fastener size or spacing where the door schedule specifies otherwise. |
| Header or hood supports, if required | Connect only to the structural header or to backing designed for the door assembly; do not rely on ceiling finish or sheet material alone. | Follow the door drawings for the approved fastener type and capacity. For steel framing or masonry, use only a connection approved for the base material and installation conditions. | Install support fasteners only where the model’s instructions require them. Check that the hood or support is secure and does not interfere with the curtain or operating components. |
| Fastener installation | Ensure each anchor engages the intended structural member or approved substrate. | Use fasteners with the specified material, coating, dimensions, and installation method. Follow required pilot-hole, edge-distance, embedment, and torque instructions where provided. | Do not over-tighten or use damaged, corroded, or mismatched fasteners. Replace any fastener that spins, strips, or fails to seat properly, and correct the substrate issue before proceeding. |
| Final alignment and inspection | Verify that guides and brackets remain secured to structural framing after the door assembly is installed. | Check installed fasteners against the door-specific schedule; confirm all required locations are filled and connections are not loose. | Operate the door as directed and check for smooth travel, consistent guide engagement, and contact or binding. Correct alignment only using the manufacturer’s procedure. |
Important: Fastener size, spacing, embedment, and capacity vary by door model, opening loads, and framing material. Use the current manufacturer’s installation instructions and approved project details; obtain qualified design guidance when the required structural connection is unclear.
Before lifting the barrel, check that the opening is square and the support brackets are firmly fixed. Use a level across the barrel; even a small tilt can make the curtain track unevenly. Follow the door’s installation instructions for bracket spacing and fasteners. Keep the barrel supported while positioning it, and do not stand beneath a suspended load.
Tips: Wear gloves and eye protection. Keep fingers clear of the guides. Set spring tension only as specified by the manufacturer. If the instructions are unclear, or the barrel feels unstable, stop and contact a qualified installer. Stored tension can cause serious injury.
Feed the curtain into both guides without forcing or twisting it. Check that its edges remain seated as it moves, then test operation slowly from a safe position. The curtain should travel smoothly and stay level. If it binds, shifts, or drops unevenly, stop rather than adding tension by guesswork. Recheck the alignment and installation steps. It can be tempting to make a quick adjustment, but that is where careful work matters most.
After installing a motorized roll-up garage door, test its operator with the doorway clear and the door fully visible. UL 325 requires entrapment protection, and industry guidance describes two protective means for residential operators. Check that the photoelectric sensors face each other, sit no more than six inches above the floor, and show aligned indicator lights. Break the beam with a box or your leg while the door closes; it should stop and reverse. Keep hands clear of the curtain and tracks.
Then test the contact-reversal function using a flat, one-and-a-half-inch block beneath the door, following the operator’s instructions. The door should reverse when it contacts the block. DASMA’s operator-safety guidance uses this test height and emphasizes keeping sensors correctly positioned. Test it twice. A single successful cycle is not proof that the system will respond reliably every time; I would not skip a retest after adjusting limits or sensor brackets. If the door hesitates, fails to reverse, or closes unevenly, disconnect the operator and have a qualified technician inspect the setup before regular use. Don’t compensate by increasing force settings.